Changing Idler Arm ( courtesy of R.Ambrose )
The Idler Arm is on the passenger side and looks similar to the Pitman Arm.
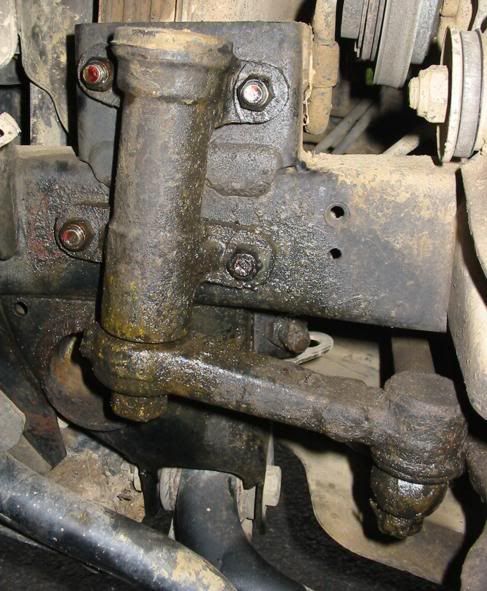
The Milner version

It took me about 40mins once the wheel was off and that was 30mins getting the old one off.
Tools required
Jack & axle stand.
14mm spanner
14mm socket
19mm socket
7mm spanner (for the grease nipple supplied by Milner)
Ball joint splitter or large flat bladed screwdriver
Soft faced hammer.
Pliers and heavy duty snips\cutters for split pin
You'll need to remove the bash plates and mine uses 12mm bolts plus 2x Torx (forgotten the size)
1. Remove and discard old split pin
2. Undo the castlated nut. Turn it upside down and loosely refit.
a. This protects the castle bit and the thread
3. Think of someone who gets on your nerves and start whacking this nut with the soft hammer.
4. If you've got the ball joint splitter then use it otherwise it's the large screwdriver and some more whacking.
a. It will eventually release.
5. Undo the 4 mounting bolts.
a. Note these are loose nut and bolts so require a 14mm socket and spanner to undo.
b. Should the bolts fall out note they are different lengths.
c. The forward, lower bolt is better accessed via the front of the vehicle (hence the removal of the bash plates)
6. Fit the grease nipple supplied and pump some grease into the idler arm body.
a. Don't know if this was my fault but I put too much grease in and popped the seal\bush out a bit. I was expecting excess grease to come out past the seal. I was able to push it back in without any trouble.
7. Loosely mount the idler on the 4 bolts.
8. Make sure the taper and it's corresponding mating surface are clean.
9. Smear a film of grease on the taper and assemble.
a. Torque for the castlated nut is 44 - 54 Nm
10. Tighten the 4 mounting bolts to 59 Nm
11. Check the steering moves freely.
12. Fit the supplied split pin
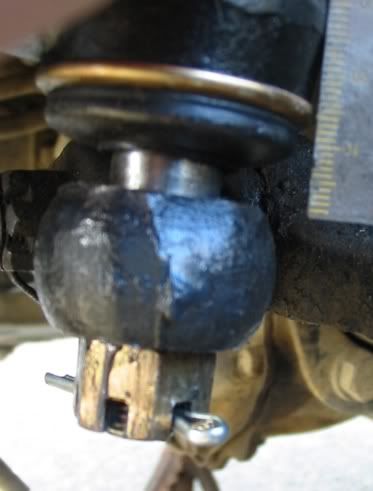
I was a little concerned that the taper was a poor fit as there was a gap of over 5mm (see photo)